So far I have concentrated on driving my telescope and Zwo ASI camera, which is great for planetary and lunar imaging, but for widefield imaging with long exposures, a DSLR camera is a better tool, especially when attached to an equatorial mount. I have a Sky-Watcher Star Adventurer Pro, which eventually I will look at auto-guiding using Astroberry. For now, the question is, can Astroberry drive a Canon DSLR?
Simply yes. While a intervalometer can be very cheap, Ekos on Astroberry can give you more powerful control of your camera. One of the Ekos developers has produced a YouTube video of the process. It is hard to beat this, so this post will only give a brief overview.
I’m using a Canon 700D camera, but the same process should apply for different brands and models. The camera can be connected with a USB A to Mini USB lead. (USB Mini is the chunkier connection, where Micro USB is the smaller flatter connection common in mobile phones.) Turn the camera on and doing dmesg in a terminal window should show the camera recognised as a USB device. Tip: An active USB extension cable is useful when experimenting. Put the camera into manual and bulb mode, otherwise the ISO and many other settings will be fixed.
astroberry@astropi:~ $ dmesg
..... output cut ......
[  202.946173] usb 1-1.1: new high-speed USB device number 4 using xhci_hcd
[  203.087966] usb 1-1.1: New USB device found, idVendor=04a9, idProduct=3272, bcdDevice= 0.02
[  203.087987] usb 1-1.1: New USB device strings: Mfr=1, Product=2, SerialNumber=0
[  203.088005] usb 1-1.1: Product: Canon Digital Camera
[  203.088023] usb 1-1.1: Manufacturer: Canon Inc.
astroberry@astropi:~ $ lsusb
Bus 002 Device 002: ID 7825:a2a4
Bus 002 Device 001: ID 1d6b:0003 Linux Foundation 3.0 root hub
Bus 001 Device 003: ID 067b:2303 Prolific Technology, Inc. PL2303 Serial Port
Bus 001 Device 004: ID 04a9:3272 Canon, Inc. EOS 700D
Bus 001 Device 002: ID 2109:3431 VIA Labs, Inc. Hub
Bus 001 Device 001: ID 1d6b:0002 Linux Foundation 2.0 root hub
Running KStars and picking the Ekos tab (observatory icon), I created a new profile for the different imaging setup. I set the mount to Telescope Simulator (to be changed to the Star Adventurer in the future) and Canon DSLR for the CCD. Same as the camera in the video, I was prompted for the sensor settings, which was 5186×3456 pixels and a pixel pitch of 4.3×4.3. The camera was detected as shown in the INDI Control Panel. Close the panel. Note: The camera did not detect when connected to USB3 ports, but was fine under USB2.
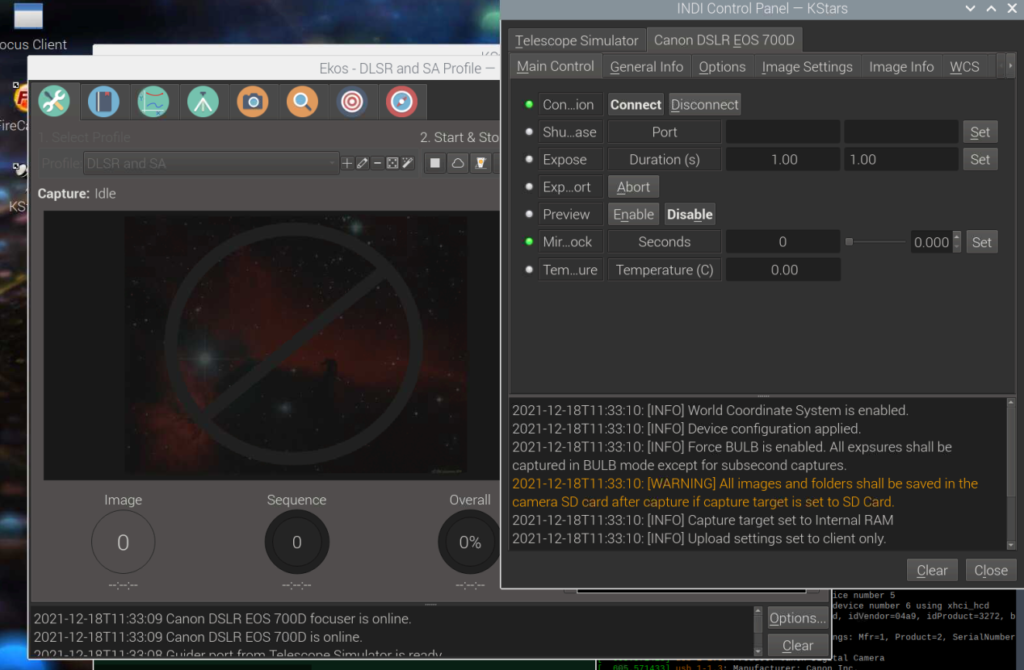
In Ekos, click on the camera tab. There are a number of settings you can change but under the left panel, clicking the live view icon will show if the camera is working.
To get started with the basics, set the exposure to something a bit longer, say 2 seconds, a count of 3 and select FITS format. Make sure you set a directory, as this defaults to the root of your home directory, and a prefix. Save locally. On the sequence queue hit + to queue this job and then the play icon. This should start the camera clicking away.
The images may appear in monochrome, but selecting ‘Native’ Format, they will produce colour JPEG files. To achieve colour FITS, in the main KStars window, go to Settings->Configure KStars, find FITS and enable ‘Auto Debayer’ and ‘3D Cube’.
Focus
In the Ekos window, the magnifier glass icon next to the camera controls the focus. Ensure the camera is set to auto focus mode on the lens. If live preview is on, you have to somehow fit both windows on the screen. Moving the focus control window partially off the right of the screen is best.
Ensure Auto Focus mode is not on (hit stop) and use the up and down arrows next to ‘Focuser: Canon DSLR EOS <model>’ to manually adjust the focus. Towards the bottom of the window are three tabs. Hitting the mechanics tab allows you to change the step size for fine focus control. You can drag an area on the live preview window for a digital zoom. The Steps section shows the current focus setting.
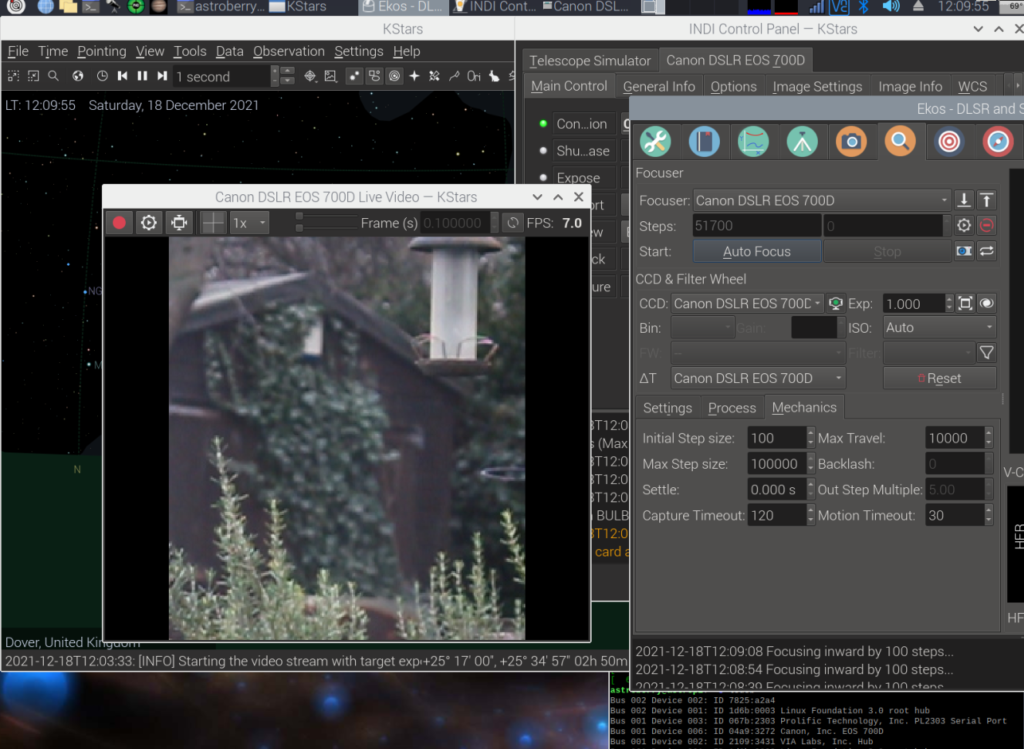
I found this process very clunky. There is quite a delay between hitting focus, seeing the difference on screen and for the steps indicator to change. Achieving a crisp focus was difficult and time consuming. Putting the lens into manual focus mode and doing it by hand was much quicker and reliable, though not so great for remote imaging.
This is a shame as the Windows Canon EOS Utility has a very responsive focus control, which was quick and easy to achieve a crisp focus. I also found that EKOS/KStars crashed a few times. The camera control provides a good option to an intervalometer but is not great for focus and fine settings. Certainly it is a development to watch for the future.
The Auto Focus options might provide better results, I may expand this page later once I have been able to try it on a clear night.
Next steps putting it together into a case *link pending*.
Comments